Project Micro Scope – Building the Ultimate Micro Racer Part 1
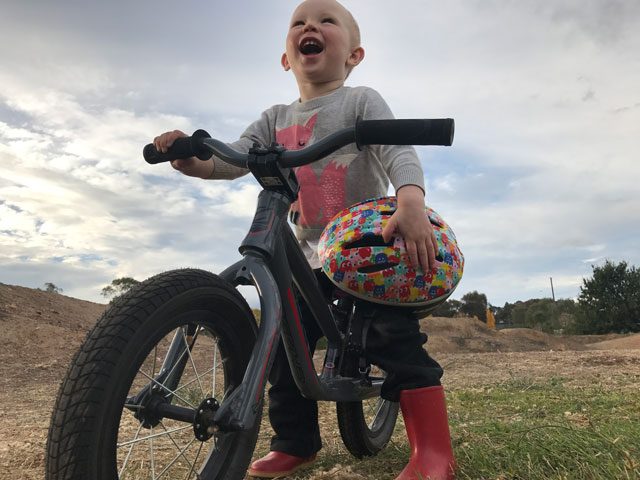
BMX racing has been with me most of my life. Just like every normal BMXer I have a room in my house dedicated to my bikes, a shed for overflow, a track in the backyard, oh and a work bench and bike stand in the lounge room. It was only natural I would want to build a micro for my four year old daughter, Ripley, and show her how much fun BMX can be.
So I found myself on the market for a micro racer. I’ll ignore the fact she has two balance bikes that she rarely uses, a 16″ SE Quadangle “that she’ll grow into” and the only bike she rides with any regularity is a 12″ pedal bike with training wheels that her grand father picked up second hand and customised for her. It’s complete with pink handlebars, flower stickers, her name and of course a bell and streamers hanging off the end of the grips. She truly loves it, so I thought it was time to start looking at a bike she could take to the race track for when she’s ready to ride. I took all the important aspects from her favourite bike, which I’d narrowed down to the fact it’s custom, and thought I’d run with that.
Sure I could have just picked up something second hand and cheap, there’s a good market for micro race bikes old and new. If you are looking for 18″ wheels though, they can cost a little more and generally get snapped up right away. I wanted 18″ wheels to get her started, mostly for confidence and control. She wanted nothing to do with her balance bike until her feet could be firmly planted on the ground.
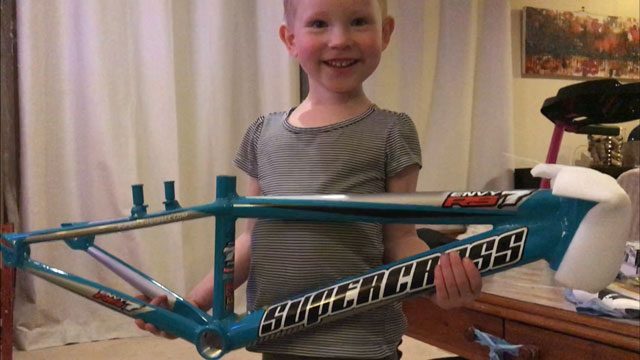
My starting point was a Supercross ENVY RS7 frame with Profile mini hubs and Alienation rims. This approach was two pronged. Ripley loves her parents, and who can blame her? She loves having gear that’s similar to her parents, even things as simple as tee shirts, so she already has a bunch of BMX tees. I have a large collection of Supercross bikes spanning the 30 years of the brand, I love them, and with four Pull Magazine awards for Bike of the Year it appears I’m not the only one. Alienation rims because bang for buck you aren’t going to find a straighter, stronger, lighter or more reliable rim. I’ve been running Profile hubs and cranks for decades, they have a lifetime warranty, are simple, reliable, easy to service, look great and I could use the same 28 hole Profile Minis on all her bikes well into the future, at least until she starts jumping. Sure somewhere along the line I would need to switch to 20″ rims but that’s not a super expensive exercise.
Beyond that though, I was reaching well into an area that I’d previously not explored. I’m lucky enough to be surrounded by friends who have either been through it all before or have a lot of experience in setting up bikes for groms.
I had a 20″ Micro Supercross Envy RS7 frame, with 18″ rims, which is not an uncommon set up, but can be tricky with brakes, something to consider when I get to that point. I had my eyes on the 20″ Supercross Pro LT cromo Mini / Jnr Forks, Bill Ryan from Supercross confirmed they would be the best option for the build, when I told him that someone had offered to modify the fork to 18″ he stated that anything smaller than 20″ would alter the geometry. That was fine by me, because like the Profile hubs, the SX Mini / Jnr forks are built to last and would also be able to be shuffled along from bike to bike until she out grew them.
For the next stage I turned to Adam Sylvester from DRT Industries (BMX Clothing Brand) for advice on crank length, gearing and stem length. He has a daughter about the same age as Ripley but more advanced on a bike. Adam had been through the process with his son Eizak a couple of years ago, and now a second time with his daughter Eva. It’s funny how different his suggestions were to what comes standard on complete micro bikes. He suggested 110mm cranks over the longer 130mm that comes on most off-the-shelf micros. We’d also discussed the zero offset stem options, they are the stems where the clamp sits over the top of the fork steerer tube. They do a great job to shorten up the rider cockpit area, but also make the steering a lot more responsive, or twitchy. Twitchy isn’t a feeling I look for in a ride so I had to look for something short, but not that short.
With all that extra information in mind, it was time to do some additional research and put my thinking cap on about how to build the bike out from there. With the key considerations being light weight, reliable, safe and where possible reusable parts. We’ll get into the build list next week so keep your eyes out for that.
Project Micro Scope: Intro | Part 1 | Part 2

Posted in: News


